maandag 23 december 2013

Thalaasaney / Beans stir fried


This is my favourite dish.....Mithil my friend in Bangalore makes sure she makes this every time we are with them. I made it here and sent her the foto to get her opinion and she mailed back saying it looked good & advicsed me to fry the Garlic a bit longer to get more brown. This dish is very easy to make .Whole crushed Garlic is used here and only when you taste the stir fried slow cooked garlic you realise how tasty garlic can be!

Ingredients:
500 gms. of fresh & tender beans
1 to 2 tab.sp. coconut oil
1 tsp. of Turmeric
8 to 10 fresh garlic crushed (dont remove the skin)
1 or two dry red chillies
Few curry leaves
Salt to taste


Method:
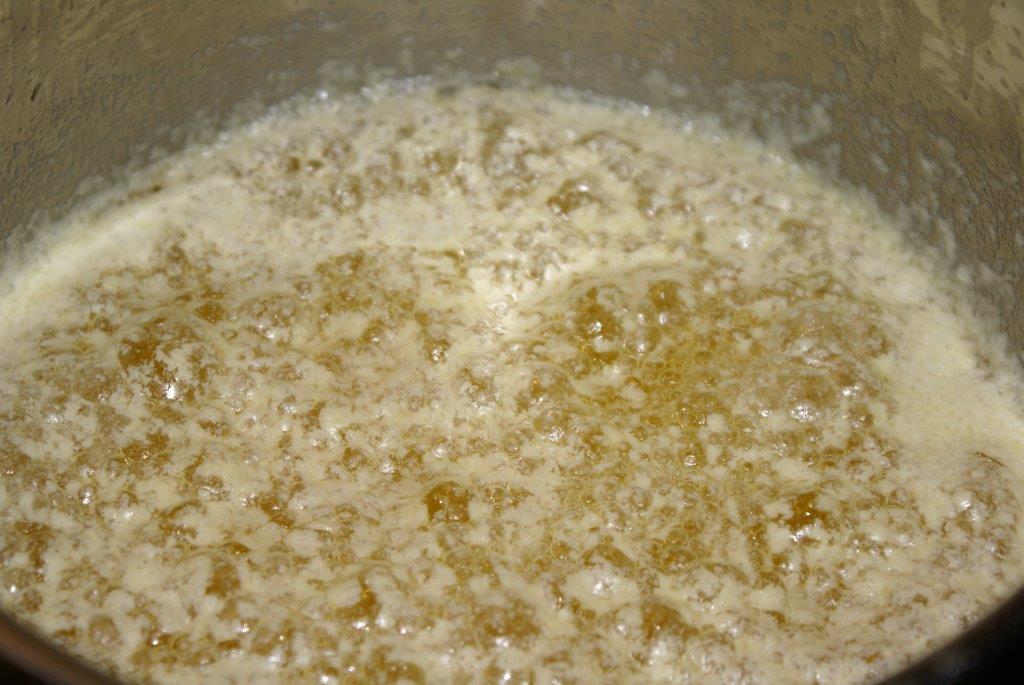
Heat the oil and fry the Garlic,red chillies & the curry leaves until the Garlic turnes golden brown.
Now add the beans cut into 1 inch length

Add the turmeric powder and salt.

Mix well and adding a few tab.sp. of water stir fry this on high flame for 5 minutes and then simmer on a low flame for another 5 minutes with the lid of the pan on.

Done!


Tips: 
You need to use coconut oil to get the great flavor. I have also used Groundnut oil / Archideolie to prepare this vegetable.
All you need here is hot white rice to go with it!
At the Hague Market you can buy fresh / tender /new Garlic and they are rose in color.

donderdag 19 december 2013

Thyme & Cucumber Salad in Yogurt Sauce


I love yogurt and I have tried almost every variety of them available at the super market.The yoghurt that reminds me of the home-made yogurt is the Turkish yogurt or even the Greek one.Have to mention these yogurts have high fat contents(10%) while the local ones have very low contents.So not always I would go for these yogurts with high fat contents. But to make this Salad I use one of them.

Its a great yogurt salad which goes well with vegetarian and non vegetarian dishes.


Ingredients:
200 ml of yogurt(Greek or Turkish)
1 large clove of garlic finely ground to a paste with 1/2 tea sp. of salt
1/4 a tab. sp.of fresh Thyme leaves.
2 cucumbers


Method:
Remove skin of the cucumbers grate and press out all the juice.

Add the garlic paste to the yogurt and give it a good stir.

Add now the fresh Thyme leaves slightly crushed to the yogurt .

Serve as a Salad with fried fish / meat or french fries.


Enjoy!


vrijdag 13 december 2013

Broccoli Soup


This is a recipe I tried out after we returned from Ireland.
A country I have fallen in love with! It reminded me of my childhood days visiting Interier(country side) of North Malabar with green grass paddy fields and narrow lanes& roads & fences made out of wood and stone even though Ireland had multiple colors of green grass fields...
On our tour we had this soup in one of the restaurants and immediately after returning I made this for my husband who fully agreed it tasted better than the one we had ..:-)
It was one of the best soup I had ever tasted.I love broccoli , want you to try this easy & simple way of making it.

This is specially for Nandu my niece in Bangalore.She had tried this soup when she had visited us & wanted me to put in on my blog.

So Nandu and all of you try it!
Ingredients:

two heads of broccoli
200 ml of cream
3 vegetable soup cubes ( groente bullion)
3 cloves of garlic
600 ml water
Few twiggs of fresh thyme


Method:
Boil 10 to 15 minutes the broccoli & the soup cubes in 600 ml of water.

Then, using a blender puree the same to a fine texture.


Add now the cream , freshly pressed /ground garlic and the Thyme twigs and give it a good stir......

Soup is ready to be served.

I love this served for lunch with toasted brown bread ....Try it out!.

Tips:
I have used the long life cream called '' houdbare slagroom '
Thyme leaves are freely available at the super markts, u can dry the left over leaves for later use.
Get one plant from the garden center, U can keep them in yourindoor or outdoor as its a winter hard plant.
If you need more salt add an extra soup cube.You can even use Chicken soup cubes instead of the vegetable ones.
If its too thick add some water to dilute. However Broccoli soup should be
thick and not watery!

zondag 1 december 2013

Utappam


This is yet another type of a Dosa.
The base of the Utappam is nothing but the usual dosa batter, but then when we add chopped vegetables or onins & make a thicker version of a dosa we call it Uttappam.
The Uttappam batter should be well fermented and more sour than the usual dosa batter. I usually make Uttappam with the leftover dosa batter.

These are the ingredients for the Dosa batter:
2 cup raw Rice
1 cup Urid dal

1 tab.sp. of beaten rice / poha (soaked along with rice & Urid)
1 tsp. Methi seeds
Salt


Method:
Soak the above ingredients for 4 to 6 hours.Grind to a smooth paste adding little water while grinding.

Add the salt and let it rest to ferment .This will take a few hours or even
over night.

Once it has fermented well keep the batter in the fridge for few hours.Add the fillings* mix well and make thick Dosas.

Sprinkle afew drops of oil on top.
Serve with Coconut chutney / Tomato ketchup or Sambaar.

Filling for the dosa / uttappam
3 Tomatos
2 onion
2 to 4 green chillies
10 to 12 curry leaves
1 tsp.grated ginger
Handful of coriyander leaves
Salt
Few pinches hing/Asefetida
Oil for frying

Method:
Chop finely all the above ingredients and add the hing/ asefetida, ginger, salt and mix well.

Pour onto a hot dosa frying pan and make thick Uttappams.Add a few drops of
oil on top.

Uttappam is ready when the bottom is light brown and the top is off white in color.
Serve hot with coconut , tomato chutney.

Tips:
I usually keep the fermented Dosa batter in the fridge for a few hours before Imix the fillings.
I have noticed when I did this the Uttappams made had small circular depressions & I have often heard people say thats how uttappam should be....
So try this out....


Next week will be about Onion & Cabbage Baje / Pakora,  So keep an eye on my blog!:)

dinsdag 19 november 2013

Spinach Stir fry


I Dont remember having heard anyone say they dont like spinach!....Spinach cooked on its own or with meat or even as a salad is very tasty! These spinach leaves we get here are very tender & I don't know if you have
noticed it's the same as the palak we have in India.In India they often let it overgrow......anyway...

This is a very simple and quick preparation & I enjoy it with just rice and yoghurt.


Ingredients:
Spinach
Dried red chilly
Garlic
Oil

Method:
Chop the leaves.

Heat a tab. sp. of oil and add the red chilly & crushed garlic.

Let it fry on a low flame until light brown.

Add the spinach & salt & stir fry on high flame for a minute or two.


Tips:
  • Once you have cooked this vegetable do not re-heat it( pl. check the internet for info.) nor serve kids below 6 months.
  • Cook the leaves the day you have bought it and eat it once a week.
  • Its even tastier if you add a potato and let it cook for a bit longer....

zondag 10 november 2013

Parotta (Instant)

If two things could keep kids happy is serving them with freshly made parottas or patat (french fries). For me making parotta is a long process even though its a VERY tasty roti /chapati like bread with plenty of fat contents in it & I feel kids can afford to have it. Of course adults LOVE it too.

There are times when I have made this in no time. Like I told u making fresh parottas is a big process
(dont we all miss Saabu who did this for us? ) Even though I make them following the long procedure, I also make this instant Parottas when I have an unexpected guest visiting us with kids. So I am sure Mothers would welcome this recipe....

Ingredients:
1 x packet of ready made puff pastry like shown here .Freely available at the deep freeze section of any super market. 
I use one with butter(roomboter)
Method:
Thaw the contents of the packet for 10 to 15 minutes.

Dust the surface with some flour & place two puff pastry on eachother and using a rolling pin roll it into desired size.


Then fry the same on either sides until light brown using NO fat.

Remember this has enough butter in it.

Serve with an egg curry or just a simple dal with spinach.

DONE!

donderdag 31 oktober 2013

Slibtong / Common Sole / Nangu mien


Recently when I was buying my fish I saw this man in front of me ordering this fish which I have never bought. I asked him how to prepare this fish and he was too eager to tell me, remarking"erg Lekker!.meaning really nice" I looked up its name and knew it was called a common Sole in English and Nangu mien in the south of India. I have seen this small flat fish which often reminded me of a
tadpole(sorry!)
I remembered how the fish monger would ask my mum to try this fish but she never bought it and I often heard her remark that it was not a fleshy fish and was good for her cats and dogs:-) ...so I had never tasted this fish back home. I bought a few and did it exactly the way the man had told me I should, and
wow! yes it was one tasty fish! I wish my mum was around to tell her that & I am waiting to go home to make this for my sisters.....
I want you to try it too.....

Ingredients:
2 slibtong / Sole / Nangu
Butter
Black pepper
Salt

Method:
When you buy this fish,  insist they remove the skin for you. Just clean it and wipe the fish with a kitchen paper and sprinkle salt and generous pinches of crushed black pepper. Then fry the same in butter until brown on either side.This will take about 10 to 12 minutes.
Done!


Note to remember:
- Use lemon juice to clean your hands or even a bit of tooth paste to get rid
of all the raw smell of the fish.

-I have dipped the fish in fine semolina but this is an option.You can sprinkle a bit of white flour / maida or rice powder.
Its an expencive fish but is worth trying.

dinsdag 22 oktober 2013

Spruitjes / Brussels Sprout

This is one vegetable either you love it or hate it!.I love it and it should be cooked just enough to be crunchy. If you overcook, it tastes & smells awful. Its like a small cabbage. You need to remove quite a bit of its outer
leaves when you cook it. I will show you an easy way to make this vegetable.

If you want your children to eat any vegetables you need to start feeding them as young as 6 months old babies. Cook the vegetables(any) with a potato & puree it adding a tab.sp. of milk and try feedin them...that age they are ready to eat anything and very soon you will realise they love what you aren feeding them.
What a joy!

Ingredients:
250 gms. Brussels sprouts
Salt
a good knob of Butter
Few pinches of Nut meg powder
1/4 glass of water.


Method:
Remove the outer skin of the Brussels sprout add the water & salt and bring to boil.

Close pan with its lid and let it simmer on a low flame for 5 to 6 minutes.

Switch off the gas and after 10 minutes drain all the water & immediately add the knob of butter and the nutmeg powder and give it a good stir

Done!This is the only way I would like to have this vegetable.

Tips:
I usually drain the water after I have cooked this vegetable. But steaming this
vegetable is the best as this vegetable has cholesterol lowering benefit.

dinsdag 8 oktober 2013

Ada Pradhaman / Payasam / Kheer

Who can resist this dessert/payasam / kheer ! Even myself, a diabetic, won't or can't!....its sooo good you just want to have it and have it and even after days you can talk and talk about its taste!.

This recipe is dedicated to the late grandmother of Sumi Ajith. We (Sumi & myself) had made this for an Onam lunch years back perhaps in 2008 for over 200 people which was such a hit and believe me I still have people coming up to me to remind me of this glorious pradhaman or payasam we had served for the lunch.

I wanted to share this recipe, so I asked Sumi who willingly agreed i could display the same on my blog so here we go....

Ingredients:
200 grams of Rice Ada
400 grams of Jaggery  (make a surup using half a cup of water). We used palm sugar.
3 to 4 tab.sp. of Ghee 
Milk of one Coconut or use 200 ml of Kara coconut milk
1 tsp. Cardamon powder 
1 tsp.Chukku powder / ginger powder 
1 Tab.sp Cashew & raisins.
1-2 tab.sp Coconut pieces cut into small pieces 

Method:
Boil Ada in plenty of water until its soft then drain & keep aside.

Boil the jaggery in half a cup of water , strain & keep aside.
Fry the coconut pieces until brown the kismis & the cashew pieces in Ghee and keep aside.

Take milk out of the fresh coconut and divide into three, using not more than a cup of warm water in all.

Take 1-2 tab.sp. of Ghee and add to the cooked ada and stir well on a low flame.
Then add the strained jaggery to ada and stir well.

Add here 1/3rd of the milk.(or use half of the canned coconut milk)

Let this simmer for a while and then add the rest of the coconut milk, stirring gradually. Simmer for at least 5 to 10 minutes.

When the payasam thickens add the cardamom & ginger powder.Stir well.

Now add the fried coconut pieces, cashews & the raisins.

Stir well & the Ada pradhaman is ready.


(The quantity of jaggery and ghee can be changed according to your taste)

ENJOY!


Tips:
  • Not all packets of rice ada is really rice, they are made with white flour / maida 
  • If you dont have rice ada at home, buy the transparent rice noodles from the Chinese store and crush and break it as small as you can. This works perfectly well for an ada pradaman.
  • I have used palm sugar instead of Jaggery here & Instead of the fresh coconut milk the Kara brand coconut milk. & Home made ghee.
  • Mind you, Ada pradhaman tasts best if made at least hours ahead of the serving and tastes its best if served warm on a banana leaf!!!!!

Stoofperen/ Cooking Pear


I want to show you something my Mother in law often made this time of the year which she would serve with a Dutch dinner. If you have gone through recipes I have placed before the 'hutspot" goes perfectly well with this dish and it is also SO easy to make. Is also tasty if served with full cream.

This cooked pear is almost like a Jam or pear preserve. However, it is made
from the special stoof peren / cooking pear used for cooking purpose
found all through the year. Dont know if it's tasty if ripened. It can be
preserved in the fridge for few weeks or even frozen.It goes well with all
kinds of food. I serve this when I make any European food.
At the super market it' s available at the vegetable section.They are usually
small, hard and never sold ripe.

I have used Winter wine as this wine has all herbs and add a great flavour
to the dish.If you do not want to use wine, you dont have to, instead u can
use wine vinigar or just a few table spoons of white vinigar.

Ingredients:
12 cooking pears
2 laurel leaves
6 cloves
1 cup of Winter wine / red wine / wine vinigar/or 2 to 3 tab. spoons
ofvinigar
1 cup of sugar
1 or 2 cups of water
A pinch of salt


Method:
Peel the pears and place them in a pan and add all the ingredients. 

Bring to boil on high flame and when it begins to boil lower the flame and simmer for half an hour until the pears are soft.

Cool and preserve.

That's it....that easy!!


dinsdag 24 september 2013

Hutspot


Hutspot is a very Dutch dinner which I Love! As do all my family and friends who have had it with us. Must say it was tough to convince them and often people have raised their eyebrows when I would ask them if I could cook them a Dutch meal.

However, once they had tried the food they all agreed it was delicious & remark: "the Dutch eat like this? its tasty"

I recently had one such successful lunch here at our residence ,all Indians who had never heard or known what Hutspot was and they loved it too....Rohit,Anu,Sudeep,Ritesh,Dipen, Kishan, Ruta..will all agree with me....


So please try this out.

Making Dutch food takes less time unlike our Indian cooking. I make sure we have Dutch food (potatoes) every alternate day and enjoy every bit of it!

Ingredients.
500gms. of potatos
250gms. of onions
250 gms. of carrots
1 veg. soup cube
25 gms. butter

(I would count 2 potatos, an onion and a carrot per person)


Method
Peel potatos and carrots and cut them into fingerchips size pieces.

Slice the onions lengthwise.

Take a heavy pan and add the carrots , the onions & the potatoes on top.

Add water until potatoes are all immersed in water. Add the soup cube and some salt.

Bring this to boil. Then close pan with its lid and cook the hutspot for 15 to 20 minutes.
(you need to leave the pan open a bit to allow steam to escape.)

Check if the potatoes are done.

Before you drain the water keep aside a few cups of it to make the sauce for the hutspot.

Once the hutspot is drained of all water add butter and mash it well:


Hutspot is ready.

This is served with fried meat or sausage or if you are a vegetarian a soya
burger & a sauce or 'jus' as the Dutch call it.

To make readymade sauce / jus
You need to buy this sauce powder which comes in vegetarian and non veg.
form.


How to make the sauce/ jus
Take a pan and melt a knob of butter and add one or two tab.sp. of this jus
powder and fry for a few seconds.Then add the water you had kept aside and
stir well & simmer for a few minutes until the mixture thickens.This is then
poured on the Hutspot and served with a piece of meat, apple moes,
gerkins(augurk) & pickled onions


yummy! Yummy! Yummy!

zaterdag 14 september 2013

Onam Special: Ghee Rice


WE WISH YOU ALL A HAPPY ONAM 2013!!
Rajani & Ilse


This is no doubt one of the exotic rice dishes that brings out the quality of the home made Ghee and the Basmati rice, King or Queen of the rice.
I have hardly had anyone say no to Ghee Rice, even though its very rich in ghee (clarified butter)
A rice dish that is made for occassions like a festival or a birthday, using only ghee. 16 September is Onam 2013 and
this dish fits perfectly in the Onam lunch or dinner.

When I prepare this dish my entire neighbourhood would get the aroma of the ghee, the basmati rice and the whole spices & I have often got remarks like: "woman what are you cooking we get so hungry!"
Yes, that's exactly what this rice dish will do to you as it brings out its exotic qualities .....
Try this out, it takes no time and you will LOVE it....


Ingredients:
1 cup Basmati rice
2 cups of hot water
Juice of half a lemon
3 cardamom pods
4 cloves
2 sticks of cinnamon
A pinch of Saffron soaked in a tab. sp. of hot water
A handful of cashewnuts
Half a handful of raisins
2 to 3 tab. spoons of Ghee
1 tsp. salt
A heavy pan ( i use the cast iron / Dutch oven)
A cotton/ woolen quilt


Method:
Wash & soak rice in cold water for half an hour and drain this well in a colander.This rice needs to feel and look dry.

In the mean while heat a heavy pan and add the ghee.As the ghee begins to melt on a medium flame add the cashewnuts and as it turns light brown add the raisins, the whole spices(cardamom,clove & cinnamon) & then the rice.


Using a wooden spoon gently stir the rice making sure every coral is coated in ghee and let the rice get fried on a medium flame for 3 to 5 minutes stirring just a few times.

Then add the hot water, saffron water, lemon juice and the salt .Again gently stir the rice and turn the flame to high and let it cook/ boil for 5 minutes.


Afer the rice has been boiling for 5 minutes on a high flame lower the flame, give it a final stir ,clover the pan with its lid and immediately place it on a quilt and pack it well allowing no part of the pan exposed and place a heavy object on top.


See how well the rice is cooked ..all in a quilt......the whole process took less than 10 to 12 minutes.


Done! that's it ...Can it get any easier?
Remember your rice is being further cooked so do not open until it's time to
serve.


Tips:
  • Rice remains hot for hours if u follow this and remember you are using less electricity or gas....
  • If you have a large wooden box you can line this box with an old blanket and place the rice inside this box.
  • When I make boiled rice I use this method. Even after 4 to 6 hours I am able to serve HOT rice.
  • Buy a cast iron / Dutch oven vessel specially to make rice items. They are expensive but they are life long pans!.
  • Don't your neighbour give you a good smile passing by......smelling the aroma of Ghee Rice you have just made?
  • Please leave a message if you tried it!

donderdag 5 september 2013

Sheera / Khesari

As a kid I never liked this sweet dish.It was only recently I had started tasting it.
I made this as an item for the Friday dinners and realised how everyone
liked it.
(I still have to like it though ;-).....perhaps its because i am not really fond of sweets)

However, I must say it's a very easy, sweet dish one could make & I could remember how my mum would slowly slip into the kitchen when we got unexpected guests and in no time serve the guests hot Sheera and coffee.

In Udupi, my home town, we called it Sheera or Khesari.The name Khesari was given perhaps because of the keser(saffron) which gave out a beautiful golden color to this dish.

This recipe is specially here for MANISHA Samal who's favourite dish it is & who has often asked me to teach her how to make it. Here you go...


Ingredients:

1 cup of rava / semolina /griesmeel (fine or medium fine)
1/2 cup of sugar
A handful of cashewnuts split
A handful of raisins
1/2 a cup of pineapple pieces
3 cloves
3 crushed cardamon pods
A pinch of saffron soaked in a tab. sp of warm water
A pinch of salt
3 cups of hot water
2 to 3 tab.sp of ghee


Method:
Heat a heavy bottomed pan and add 3 tab sp. of ghee (click to see how to make ghee).

Fry the cashewnuts &raisins until it turns slightly brown.

Now add the cloves and the rava/ semolina and fry on medium flame taking care not to burn the
mixture.

Make sure the rava is well coated in the ghee.

This will take about two to three minutes.

Add now the pineapple pieces, sugar & salt and mix well.

Add the hot water & the saffron and mix well. Close pan with its lid and
simmer for five minutes.

Then stir and simmer for another 5 minutes.
Sheera is done:)


Tips:
Serve this hot with ice cold mango pulp or even ice cream.
You can serve this hot or cold.

GHEE / Clarified butter


If you follow this method, Ghee is not difficult to prepare.
I have taught all my cookery students how to make ghee and they
have all told me they have succeeded in making good ghee after few failures.
So dont give up!

To make Ghee you need to buy the pure butter (in Dutch: roomboter).


Here we go:


Take a heavy pan and simmer the butter on a low flame for 10 to 15 minutes.

At some time you will have to almost close the pan with its lid to avoid the spluttering of the butter that begins to boil.

After 10 to 15 minutes it should look like this:


Then in another few minutes bubbles begin to form on top and this is when you
need to be careful as at this state the ghee can get burnt.


Finally when u see dark spots forming on the bottom & sides of the pan
turning brown you need to switch off the fire.
When the ghee is done, this is how the bottom of the pan will look:


Allow the ghee to cool for 10 minutes and strain & store in a clean air
tight bottle.


Tips:Ghee remains fresh for a longtime if kept in the fridge.
Hot rice tastes excellent just with a few drops of ghee on it.

Hope you succeed !...

donderdag 29 augustus 2013

Chicken/Meat Kebab


When I grew up chicken or meat was never a must in our daily food. However,  I
remember we had fish every evening for dinner as we lived close to the
seaside(Malpe). Meat was ment for guests so when preparations were made for a
chicken or meat curry often we were expecting guests..........

I have given up meat.... to be honest sometimes I have cheated by having the
rice part of the biriyani or the gravey of a chicken curry.But my husband
has compleately given up chicken or any meat so I dont cook any non
veg. Instead, we have as much fish as possible.

However, when we get guests at home I have made this recipe which has been
well appriciated by all.
Recently I made this when Viren had come to have dinner with us. One bite
into the kabab he asked me:"Aunty who made this? " When I told him I had, he
replied: "this is exactly how kebab shoul be" & I said to myself 'I have a
recipe for my blog!'

So try this out. Its simple and easy. You would have noticed & agree with me
by now that I use very few spices and herbs yet am able to bring out a
delicious dish.

Ingredients:
500 gms. of any minced meat /chicken

1 rusk or 1.4 cup of fine bread crums
5 cloves of garlic
Ginger (same amount as the garlic)
1 heaped tsp. black pepper powder
1 tsp.garam masala powder
1 tsp.turmeric powder
1/2 tsp.red chilly powder
Two handfull fresh coriander leaves
One handfull mint leaves
Juice of half a lemon
Salt to taste


Method: 
Grind to a fine paste the ginger, garlic,coriander & mint leaves.

To this add the chicken/meat mince & all the other ingredients and mix very
well.

Make round or oval shaped kebabs and shallow fry in a greased pan for
10 to 15 minutes on either sides.

Slice a kebab to check if meat is well
cooked.

Serve with mint or tomato chutney as a starter.

Enjoy!

Tips:No need to use extra oil to shallow fry the kababs as the minced meat
does give out a lot of fat when cooking.
Fry a mall piece of the kebab to check if it is salted well.
Make kebabs and deep freeze them by placing a layer of the baking paper to
avoid getting the kebabs sticking to each other.
Kebabs can be grilled on a BBQ or an oven.

donderdag 22 augustus 2013

Orange Lentil Curry (Dal)

Easy Dal Curry in minutes


I came to the Netherlands in 1984 and didn't know where to find the Toordal
or any other dal I could make a dal curry with. However, this one lentil caught my
eye at the Turkish store and ever since I have used only this dal for any
Indian curries I make. I discovered it cooks in no time & it's also a very
tasty lentil to make our Dal Curry.
I started this Rice & dal with courgette / Zucchini with my son when he was
4 months so also with Ilse & Marijn the two babies who I had baby sat when
they came to me as 3 months old babies.....Now they are all grown ups and
still come to me to have 'Dal & Rice".....
I had omitted the green chilly and the seasoning until kids were
older.

I am sure if you have tried this recipe you will agree with me that it is
the best dal...
It takes probably 10 to 15 minutes to make it and can be stored in the
fridge for another 3 to 4 days.
Always make sure, for the days consumption you take, just warm or steam the
required amount of the food and not heat the entire pan.This way the
food remains fresh for a few days in the fridge and you are not reheating
it.
Ingredients
Zucchini / courgette cut into pieces
1/2 tsp Turmeric powder
1 slit green chilly (option)
1 cup of Orange lentil (they do look like our masoor dal but its not the
same)
Salt to taste

Seasoning
1 tab.of ghee
2 cloves of garlic sliced into thin flakes
1 dried red chilly split
Juice of half a lemon

Method
Clean the Orange lentil in few changes of water & add 4 to 5 cups of water & allow to boil on medium flame.

Once it begins to boil I would remove
the white foam that forms on top of the simmering pan.

Then add the turmeric powder the green chilly and allow to cook on low flame
with the lid of the pan almost closed for 5 to 6 minutes.
By now it would have almost cooked


Add now the Zucchini / crougette & salt to taste and let it simmer for
another 5 minutes. 
Seasoning
Heat the ghee on low flame and fry the red chilly and the garlic flakes
until they are golden brown.Add this to the dal curry & add a tsp. of fresh
asefetida/ hing dissolved in water or a few pinches of powdered asefetida /
hing.

Asefetida dissolved in water


Orange lentil /dal is done.
Serve with rice or chapaties


Tips: One cup of this dal is sufficient for 6 persons.
If too thick add boilingwater to the dal curry.

Enjoy!